designed with the operator in mind
TAC-Scan, designed for ease with the operator in mind. TAC-Scan provides quantitative measurement of tread depth to accuracy of 0.4 mm, with visual report record for the customer. Whether it is the F-1 Floor Version or the H-1 Hand Held models have common purpose.
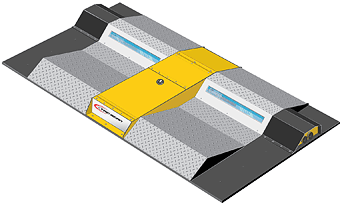
Illustration of the TAC-Scan 'Drive-Over' Unit, Model DO-1


DO-1 Model, F-1 Model & H-1 Model
common elements
common elements
- Laser Measurement System provides accuracy of 1/64” (0.4mm)
- Scans up to a 13” (330mm) tread width in 15 seconds
- Measures tread depth across 600 data points on a 13” wide tire
- Stores up to 500 scans downloadable via USB memory module
- USB Bar Code Scanner or Magnetic Card Reader for quick vehicle ID entry
- Scan from 1 to 18 wheels in the most popular axle configurations
- Utilizes a Class II laser with less than 1 mW of laser output power
- NEMA 5/IP52 rating provides resistance to dust, dirt and water
- PC Based Diagnostic Software Package provides customized report that includes tire tread profile, tread depths, inflation pressure, customer/vehicle information and recommended actions
- Patented Worldwide (US Patent 6,789,416 B1)
Join our E-mail List
Unique To The DO-1 Model:
- Heavy Duty ramps for cars and light trucks
- Dual Lasers quickly scan right and left side tires in one step


